How to Make an Animated Slide Show Video with Windows Movie Maker

When the writer wanted to make a video, he searched for a software program he could buy and was delighted to find he already had video editing software built-in to the operating system as part of Microsoft's Windows Essentials software suite.
Formerly known as Windows Live Movie Maker, the first release was included with some Microsoft operating systems in 2000. It is also available as a free download.
The latest version of Movie Maker was designed to enable the beginner and "people of all ages" to easily make a video with a professional appearance. For the writer, the learning curve from zero to publishing the slide show video with music shown on this hub was a pleasant and fun day and a half. It was time which went fast.
Movie Maker is a friendly tool for sculpting pixels into a form which satisfies. It has capabilities beyond those used to make this first video, now happily running on YouTube.
Choose Your Image Editor
For those with little or no prior experience, an image editor is recommended to complement Movie Maker. Many different editors are available, and there are hubs which explain their features. The writer has used Irfanview for many years. Someone once asked, "What is the best software program to use?" and the answer came back, "The one you know." It has some truth.
IrfanView is a very fast, small, compact and innovative freeware graphic viewer for Windows. It is designed to be simple for beginners and powerful for professionals (description from the Irfanview home page.)
The writer learns best by doing, and a project in which personal interest is invested is a powerful motivator. There are a wealth of internet resources which provide help for Movie Maker users, including a Microsoft forum to have specific questions answered. This hub will walk through the basic steps which culminated in the video shown below.
Step One: Make a Project Folder and Collect Images and Text
A little preparation lays a solid foundation for a slide show video. That means to make a new folder with the project name and add images to be used, in their order. The ratio for wide-screen video as used by YouTube is 16 : 9, so the writer made his images 1600 pixels wide by 900 pixels high at 300 dots per inch (as he likes dpi-rich images.)
Another way would be to make the images 1920 X 1080 or 1280 x 720, two common sizes for wide screen high definition. There are other choices listed in the Movie Maker Save menu, which also show the size of the saved file in megabytes per minute - which is a primary consideration.
He also typed text for the video's slides into a Word document. As many revisions were made in the text before opening Movie Maker, it was then easy to copy and paste with few text revisions while in the video making process.
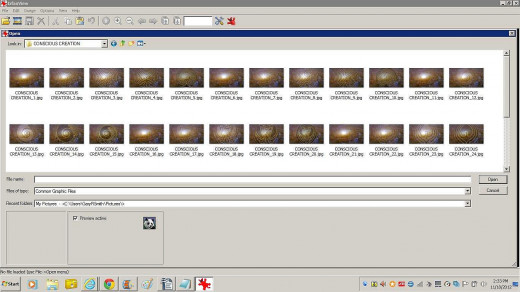
His image folder looked like this, from within Irfanview:
Now, open the Movie Maker program. The writer likes to give himself an overview of a new program by clicking on all the buttons in the menu bar and starting to get a feel for how it is arranged.
Step Two: Add Images to the Movie Maker Workspace
When the 'Add Photos and Video' button is clicked, you can find your project folder and add all the images at once from there to the Movie Maker workspace.
Of course, there is always more than one way to do things and probably easier ways than the writer used for his first video. If the reader has suggestions or pointers, they would add to the value of this hub by being written into the Comments. After loading the blank images, the writer began playing with the text, transitions and special effects.
Now, here is a point for the novice video maker to remember. It came from the 'extras' DVD for the movie, 'National Treasure: Book of Secrets.' The producer said to the effect,"Many people think that when a movie script is written, the lines and scenes are followed without change. It just isn't so. Making the movie is a process and the script is re-written as it unfolds."
That was the writer's experience, as he continually changed the 'script' while he was learning the program and the video unfolded.
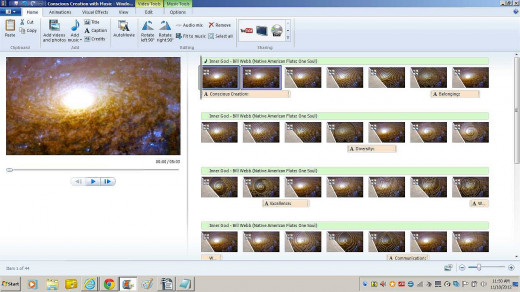
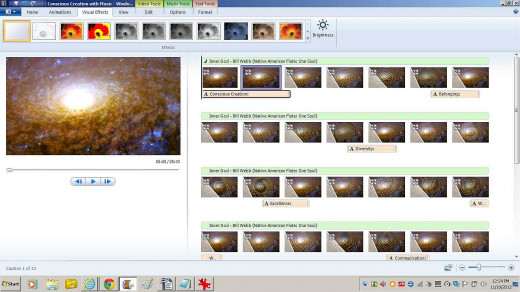
The image below shows the workspace for making the 'Conscious Creation' video, which was renamed 'Centering by Emanate Presence.'
Play in the Sandbox
The writer has found that the best way to learn anything is to let go of timidity and begin experimenting. When 'the script changes' with a new idea, he uses 'Save As' and renames the project so the first rendition can be returned to if needed. And after losing data to hard drive failures, he now backs up projects with many hours invested, onto a USB stick.
Step Three: Add Text and Formatting
Text can be added by making an image active and clicking on 'Title', 'Caption' or 'Credits.' A text box opens and your text is typed or pasted into it. Formatting options are standard, but the fun part begins with the effects.
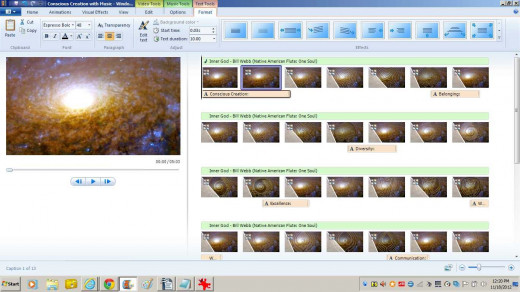
Go ahead, mouse over the effects and you will see in the preview window how it will look when played in the video. The text effects are shown in the upper right of this screen capture, although they may appear differently on your screen:
Step Four: Play with Animations and Visual Effects
Next, play with the Animations and Visual Effects. In the same way, when you mouse over the icons you will see how the effect runs with the active image. Just click on a chosen effect, and it will be added to the selected image. You have options such as the duration of the effect, and can also change the brightness of the background image. Those functions will be found by reading the simple layout of the menu.
Let's say you have an image with an effect and animation and want to repeat it through the video. You can copy and paste the image, and it will keep the added information. Images can also be dragged into new positions. Click on the pink text bar to edit the text, and onto the Effects button (the icon with four multi-colored square in the upper left of the slide image) to change a text effect.
If you want to replace an effect, just click the new one. Each slide can have one effect and one animation. If you change the duration of an image effect, it can change the way the text effect appears, so use the Play function frequently to check your results.
When you look closely at the screen capture, you will see an angle of lighter shade on the left side of each slide. That tells you the duration of the image effect. Mousing over or clicking it also shows what effect and animation have been added. It is helpful when shaping up the video and assuring its smooth flow, to watch those angles and the pink text bars and adjust them as needed.
Step Five: Add Music, Fine-Tune and Publish
Adding music is accomplished by .... clicking the 'Add Music' button and selecting your audio file, which is in your project folder. The writer keeps such things as the permission email to use a music file and related notes in an online project folder. The music can be adjusted with fade in and out, start and stop times, and so on. Video files, Title and Credits can also be added. Movie Maker has an option to skip most of the steps by choosing Auto Movie. The writer tested it out of curiosity, but prefers a hands-on approach which gives him the opportunity and joy to put himself into the creation.
Publishing a movie is very simple, with a few choices for format and resolution. With a YouTube account, it is possible to publish directly to the online service from the program. The writer tried it twice, and when it didn't work he manually uploaded the file. With a playing length of about five minutes and in HD (high definition) wide format, the file was nearly 200 mb in size and took over an hour to upload.
There is more to Movie Maker, of course, but this is enough for an overview. Now it is time to see the completed video. In this case, it is a flowing, rippling, showering, centering visual artful meditation with moving music, which can best be experienced when the viewer is relaxed and attentive.
Now sit back, breathe deep, and enjoy the show.
A flowing, rippling, showering, centering visual artful meditation with moving music.
CREDITS
Art and Video
Kati and Gary R. Smith
www.emanatepresence.com
Music
Inner God - Native American Flute - One Soul
Bill Webb
www.billwebb.biz
:::
These very helpful comments came on a Movie Maker forum thread after the article was published. The writer's thanks to the commenters!
"Nice account of your first-hand experience in using Movie Maker. I can't help but notice, from your screenshots, that you are on an older version of Movie Maker....
"Also, in terms of cropping photos to a 16:9 aspect ratio, that is a great tip. As Movie Maker loads with Photo Gallery, you might also try cropping within Photo Gallery using the built-in 16:9 option it provides...."
:::
"Nicely done.... one comment
"you say "...Each slide can have one effect and one animation..." That's true for animations but you can apply multiple effects to a picture or video clip. Go to the bottom of the effects and use the 'multiple effects...' option."
:::
"Another correction to your tutorial. You mention the gray triangle shown at the start of an image (or video). That triangle represents the transition from the prior clip to the current clip. It does not represent the duration of an effect. An effect always applies to the full length of a clip.
"Transitions - happen between two clips as one disappears and the second one appears. Examples of transitions are fades, wipes, etc.
"Effects - are applied to a clip and happen for the full duration of a clip. You can apply multiple effects to a single clip by opening up the effects, going to the bottom and choosing 'Multiple Effects' (as noted by PapaJohn)."